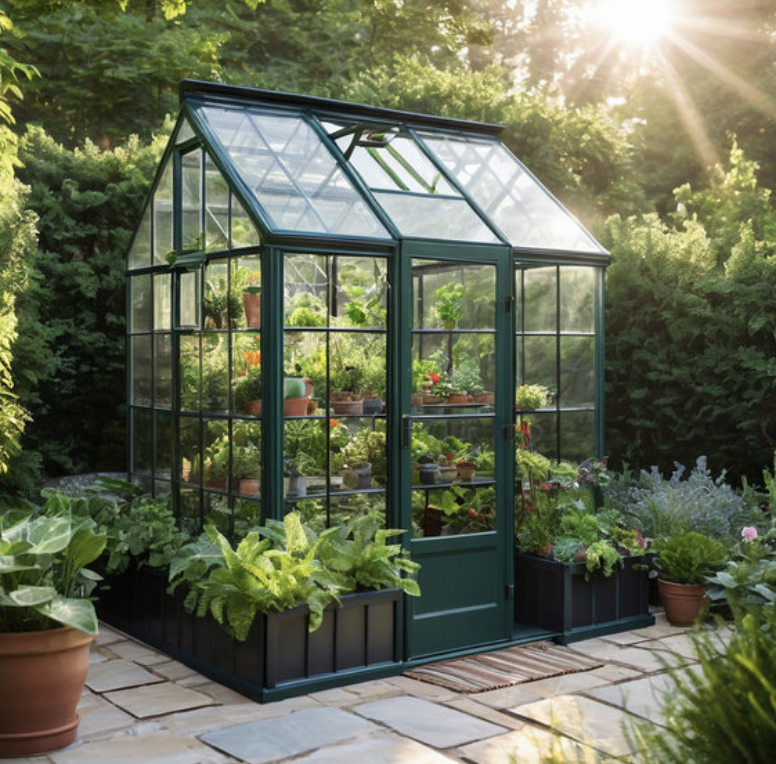
Building a small greenhouse can be a great project for anyone who loves gardening. One weekend, we were at a friend’s house and noticed a small structure in her backyard garden. It was filled with healthy, green plants growing inside its clear walls. Her plants were doing really well, even though the weather outside wasn’t.l always good for gardening. Seeing how well her plants were growing in that little space, which was no bigger than a bookcase, showed us how useful and amazing a small greenhouse can be.
Captivated by the idea, we saw in it an opportunity, not just for cultivating more greenery, but for a personal touch of sustainability right at home. The allure of having fresh herbs year-round and kickstarting our seedlings early was too good to pass up. And so, with thoughts of our own mini botanical oasis, we gathered up the resolve to embark on crafting a DIY mini greenhouse. With that being said, let’s dive into how to create a diy mini greenhouse of your own.
Planning Your DIY Mini Greenhouse
When we decide to add a mini greenhouse to our garden, it’s crucial to plan properly. Let’s nail down space, size, design, materials, and adaptation for smaller areas.
1. Assessing Garden Space and Location
Our first step is to take a good look at our outdoor space. We need to think about where our greenhouse can bask in sunlight yet stay protected from harsh winds. For those of us with limited space, even a sunny balcony or courtyard can suffice. Key considerations include:
- Sun exposure: 6+ hours of sunlight for most plants.
- Wind protection: A sheltered spot minimizes damage.
- Accessibility: Convenient for regular maintenance.
2. Choosing the Right Size and Design
Size and design are twin pillars in planning our greenhouse. We need a balance – large enough for taller plants but compact enough not to overwhelm our garden. Here are some guidelines:
- Size: Think about the number of plants and the room they’ll need to grow.
- Design: From a simple lean-to against a wall to a standalone structure, our choice depends on our available space.
3. Selecting Materials and Tools
The materials we choose frame our greenhouse’s durability and our tools make the build possible. For a sturdy and lasting mini greenhouse, we might use:
- Frame: Durable options like PVC pipe or wood.
- Cover: Glass, plastic sheeting, or even repurposed old windows.
- Tools: Hammer, nails, maybe a miter saw or circular saw for precise cuts.
Here’s a basic tool checklist:
- Hammer
- Nails/Screws
- Screwdriver
- Saw (miter/circular)
- Measuring Tape
- Safety Equipment (goggles, gloves)
Greenhouse Ideas for Limited Spaces
For those of us in apartments or with tiny outdoor spaces, clever greenhouse ideas might include:
- Upcycling: Transform old furniture into a greenhouse frame.
- Vertical gardening: Use wall or railing space to grow upward.
- Mini greenhouse kits: Pre-designed options tailored for small spaces.
We can turn limited space into growing space with creativity, transforming our small outdoor areas into vibrant spots for plants to thrive.
Building the Foundation and Frame
Before we dive in, remember that a sturdy foundation and frame are key to a mini greenhouse that can withstand various weather conditions and provide a stable environment for our plants.
4. Constructing a Solid Base
We’ll kick things off by laying down a solid foundation. This ensures our mini greenhouse stays put, regardless of the whims of Mother Nature. Here’s how we get it done:
- Choose the location: A flat, well-drained spot is ideal to prevent water pooling.
- Materials: Consider using pressure-treated wood or concrete blocks for durability.
- Assemble the base:
- Cut the wood to the desired size for the floor frame.
- Join the corners with angled pieces for added strength.
- Make sure it’s level—our plants will thank us for it.
Keeping the base raised a few inches off the ground is a smart move for better drainage and to prevent wood rot.
5. Assembling the Frame
Next, we’re putting together the frame that supports the entire structure. We’ve got a couple of options here:
- Wooden frame:
- It’s traditional and easy to work with. Cedar and redwood are great choices for their resistance to rot.
- Cut the wooden sticks to the appropriate lengths for the sides and roof.
- Metal frame:
- It provides durability and is fantastic if we’re looking for something a bit more permanent.
- Bolt the metal pieces together for a secure fit.
Regardless of the material, we’ll connect all sides at the top to complete the rectangular shape of the frame.
6. Installing the Roof and Lid
Finally, it’s time to tackle the roof and lid. These parts are crucial for controlling temperature and allowing light to reach our plants.
- Building the roof:
- For a sloped roof, we’ll need two pieces of framing that meet at an apex. This allows rain and snow to slide off easily.
- Old windows or polycarbonate sheets make excellent materials for a greenhouse roof.
- Attaching the lid:
- Hinges are our friends here, making the lid easy to open for ventilation.
- Consider using glass windows for the lid to maximize sunlight penetration.
Remember, the roof should have a slight angle to prevent water accumulation, and the lid needs to seal well to keep that precious warmth inside.
That’s it—we’ve got the foundation and frame ready to roll!
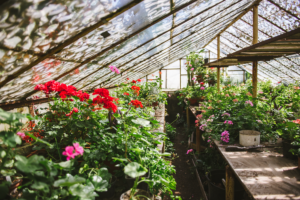
Covering and Insulating the Structure
When we’re building a DIY mini greenhouse, the covering and insulation are key in protecting plants from the cold and ensuring they get enough light and warmth to thrive.
7. Choosing the Right Greenhouse Cover
For our greenhouse cover, we have to pick a material that balances durability with light transmission. Typically, plastic sheeting is a go-to because it’s affordable and effective. We have options like polyethylene, polycarbonate, or PVC. Each has its pros and cons, so we should consider our climate and the types of plants we’re growing. For instance, polycarbonate panels are great for trapping heat while still letting plenty of sunlight through.
- Polyethylene: Economical, UV-resistant, but less durable.
- Polycarbonate: Longer-lasting, better insulation, higher cost.
- PVC: Flexible, easy to work with, but can degrade in sunlight over time.
8. Maximizing Sunlight and Ventilation
Ensuring our plants get enough sunlight while maintaining good air circulation is essential. We should position our greenhouse to face south, if possible, to catch as many rays as we can. The placement of doors and vents is important for ventilation – we’ll need at least one door and opposite vents to create a cross breeze on warmer days.
- Positioning: Face the structure south for optimal light.
- Ventilation: Doors and vents are crucial for air circulation.
Tip: On sunny days, even in winter, our greenhouse can get too toasty. We’ll need to monitor and adjust ventilation to keep our plants happy.
9. Ensuring Proper Insulation and Warmth
Insulation keeps our little green haven warm when the sun dips low. We can use bubble wrap or foam as an insulating layer between the frame and cover. For extra cold nights, a cold frame within our greenhouse, using old picture frames as mini greenhouses, can protect the most vulnerable seedlings.
- Insulation: Bubble wrap or foam panels help retain heat.
- Additional Warmth: Create a cold frame inside for fragile plants.
We need to be mindful of the balance between insulation and the need for sunlight. Too much insulation might block the light, so we should only insulate the north side of our greenhouse where less sunlight is received. On the other hand, a hoop house made with a clear plastic cover can provide a good balance of sunlight and warmth, especially if we secure its edges to prevent the cold from creeping in.
Interior Layout and Features
Creating the perfect environment inside our DIY mini greenhouse is crucial for the thriving of our plants. It’s about smartly arranging our space, considering the needs of each plant, and ensuring the right conditions for different stages of growth.
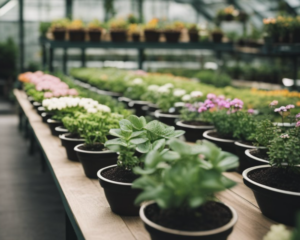
10. Arranging Plants for Optimal Growth
We need to arrange our plants in a way that maximizes their exposure to light and allows for proper air circulation. Taller plants should be placed at the back, while shorter ones can enjoy the sunlight at the front. During the growing season, it’s imperative to rotate the plants regularly to ensure even growth.
- Back: Taller plants like tomatoes or sunflowers
- Front: Shorter seedlings or herbs
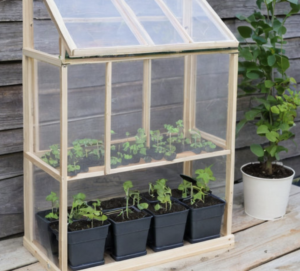
11. Customizing with Removable Shelves and Slats
Customization is key for our greenhouse’s interior to adapt to different phases of the growing season. By using removable shelf slats, we can easily adjust the spacing between shelves to accommodate the height of growing seedlings or even a single, majestic orchid.
- Shelf Variation: For seedlings, more shelves with less space. For taller plants, fewer shelves with more space.
- Removable Slats: Flexibility for plant height and maintenance access.
12. Incorporating Grow Lights and Heating Elements
To boost our plants’ growth, especially when sunlight isn’t sufficient, we install grow lights in strategic locations. For seedlings that crave warmth, we integrate heating elements at the base. These elements help to maintain a consistent warm temperature, simulating the ideal growing conditions.
- Grow Lights: Above the plants, ensuring even coverage.
- Heating Elements: Below the seedlings, maintaining optimal warmth.
Creative DIY Greenhouse Projects
When we tap into our creativity, we find that everyday items like old windows, plastic bottles, and pallets can become the foundation for functional mini greenhouses. These DIY projects not only help us repurpose materials but also allow us to grow plants year-round.
Reusing Old Windows and Frames
If you’re like us and love the idea of blending vintage aesthetics with functionality, old windows and frames offer a perfect solution. Old windows can be hinged together to create charming glass greenhouses that provide ample sunlight for plants. To start, we’ll need:
- Old Windows: 6-8, depending on the size.
- Frame: A basic wooden frame for structure.
- Hinges and Latches: To connect windows and allow access.
Upcycling Plastic Bottles into a Greenhouse
We all have plastic bottles lying around; why not transform them into a greenhouse? It’s a win-win for our plants and the planet. Here’s what to collect:
- Plastic Bottles: Preferably 2-liter, a lot of them.
- PVC Pipes: For the frame structure.
- Adhesive/Zip Ties: To secure bottles to the frame.
A plastic bottle greenhouse works wonders for small spaces and can have a unique, bubble-like appearance that’s both functional and a conversation starter.
Building a Pallet or CD Case Greenhouse
Our ingenuity doesn’t end with glass and plastic—pallets and CD cases can be just as useful. Building a pallet greenhouse entails:
- Pallets: The amount depends on how big a greenhouse we desire.
- Replacement: Glass or heavy-duty plastic for covering.
Alternatively, clear CD cases can be repurposed as panels for a small greenhouse. Durable and plentiful, they can provide an excellent shelter for our plants.
By following these suggestions, we’ve turned what might be waste into an effective and sustainable way to pursue our passion for gardening.
Gardening Tips for Mini Greenhouse Owners
When we set up our mini greenhouse, the goal is to create a perfect little environment for plants. It’s vital we get the basics right, from soil to seasons.
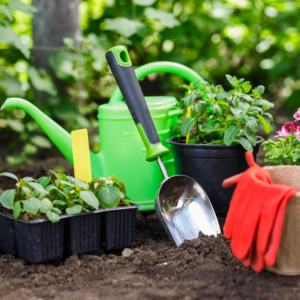
Optimal Soil and Fertilization Techniques
For us to ensure robust plant growth in our mini greenhouses, quality soil is key. A mix of two parts garden soil, one part peat moss, and one part perlite creates an ideal growing medium for our seedlings. This setup ensures good drainage and aeration. When it comes to fertilization, a balanced half-strength liquid fertilizer every two weeks should nourish our plants without overfeeding them.
- Soil Composition: 2 parts garden soil : 1 part peat moss : 1 part perlite
- Fertilization: Balanced liquid fertilizer at half-strength every 14 days
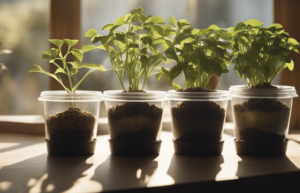
Understanding Germination and Plant Care
Germination in our mini greenhouse isn’t too different from what occurs in nature, but we control the conditions. Seedlings need warmth and moisture. It’s important we monitor the moisture levels daily and maintain a consistent temperature. If the temperature drops at night, consider a heating mat to keep our seedlings cozy.
- Moisture: Check daily
- Temperature: Consistent; use a heating mat if necessary
Extending the Growing Season with a Cold Frame
Here’s the scoop: cold frames in mini greenhouses act like a charm to extend our growing season. They trap heat during the day and keep our crops snug at night. Think of them as our secret weapon against early frosts. Just remember, on sunny days, we need to slightly open the cold frame to prevent overheating our plants.
- Heat Trapping: Crucial for extending seasons
- Ventilation: Crack open during sunny days to regulate temperature
Maintenance and Upkeep of Your Greenhouse
Owning a mini greenhouse means we’re committed to its maintenance and upkeep to ensure our plants thrive. We’ll tackle frequent cleaning, repairs, adjustment with changing seasons, and address typical hitches that pop up.
Routine Cleaning and Repairs
Cleaning: We need to keep the glass or plastic panels of our greenhouse clear for maximum light.
- Glass Panels: Wipe them down with a mix of mild soap and water.
- Plastic Sheeting: A soft cloth helps prevent scratches; avoid harsh chemicals.
Frame: Inspect the frame regularly for wear.
- Wooden Frames: Look out for rotting or insects.
- Metal Frames: Check for rust; apply appropriate paint or sealant when needed.
Repairs: Address tears in plastic, cracked glass, or loose frame parts immediately.
Seasonal Adjustments and Upgrades
Spring
- Check the ventilation systems to manage humidity and temperature.
- Examine the lid or roof for winter damage.
Summer
- Assess shading needs to prevent overheating.
- Enhance weatherproofing to handle summer storms.
Fall
- Clean and clear drainage systems before winter.
- Reinforce structures to withstand heavier weather conditions.
Winter
- Apply weather-resistant sealants to gaps in the frame.
- Upgrade insulation to keep plants warm.
Upgrades: Always consider efficiency enhancements, like automatic vent openers.
Addressing Common Challenges and Solutions
Pests and Diseases:
- Prevention: Regular inspection and removal of infested plants.
- Natural solutions: Encourage beneficial insects or use organic pesticides.
Weather Challenges:
- Heavy Rain: Ensure proper drainage to avoid waterlog.
- Strong Winds: Secure the greenhouse to the ground firmly.
Temperature Regulation:
- Overheating: Use reflective materials or shading cloth.
- Cold Snaps: Employ heaters or insulating bubble wrap.
With consistent attention, our greenhouse can be a sanctuary for plants regardless of the season or weather conditions.
Conclusion
We’ve walked through the steps to create a DIY mini greenhouse, from sourcing materials to final assembly. Here’s a quick recap:
- Materials: Gather transparent plastic sheets, a sturdy frame (wood or PVC), and fasteners.
- Location: Place it in a spot with adequate sunlight.
- Assembly: Build the frame, attach the plastic, ensure ventilation, and secure the door.
Remember, these greenhouses serve more than just a functional purpose; they can be aesthetically pleasing too. Customize to suit your garden’s look.
We can’t wait to hear how your plants thrive in their new, climate-controlled environment. With a bit of effort and creativity, you’ll extend your growing season and protect delicate seedlings from harsh elements.
Feeling inspired to take your gardening to the next level? Check out our other articles on greenhouse gardening—there’s a plethora of tips and tricks waiting for you!
Frequently Asked Questions
Do mini greenhouses need air holes?
Absolutely, we need to provide air holes in our mini greenhouses. They ensure proper ventilation, which is essential for controlling temperature and humidity. Without air circulation, our plants might suffer from mold and diseases. We typically place holes on the sides or top—just make sure they’re adjustable for different weather conditions.
What is the best material for a mini greenhouse?
When we’re selecting materials, clarity and insulation are key. Polycarbonate panels are a top choice for many of us because they offer excellent light transmission and durability. Alternatively, we might also use PVC or polyethylene film, which is more affordable but needs replacing more often. Whichever material we choose, it’s important to balance transparency, insulation, longevity, and our budget.
How cold is too cold for a mini greenhouse?
Our mini greenhouse is a champion at protecting our plants from the cold, but there’s a limit. Generally, temperatures below 28°F (-2°C) can be hazardous for most plants, even in a greenhouse. We tend to use heaters or ensure our greenhouse is well-insulated to maintain a safe temperature. Remember, the cold threshold varies depending on our plants’ hardiness.