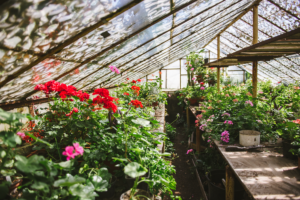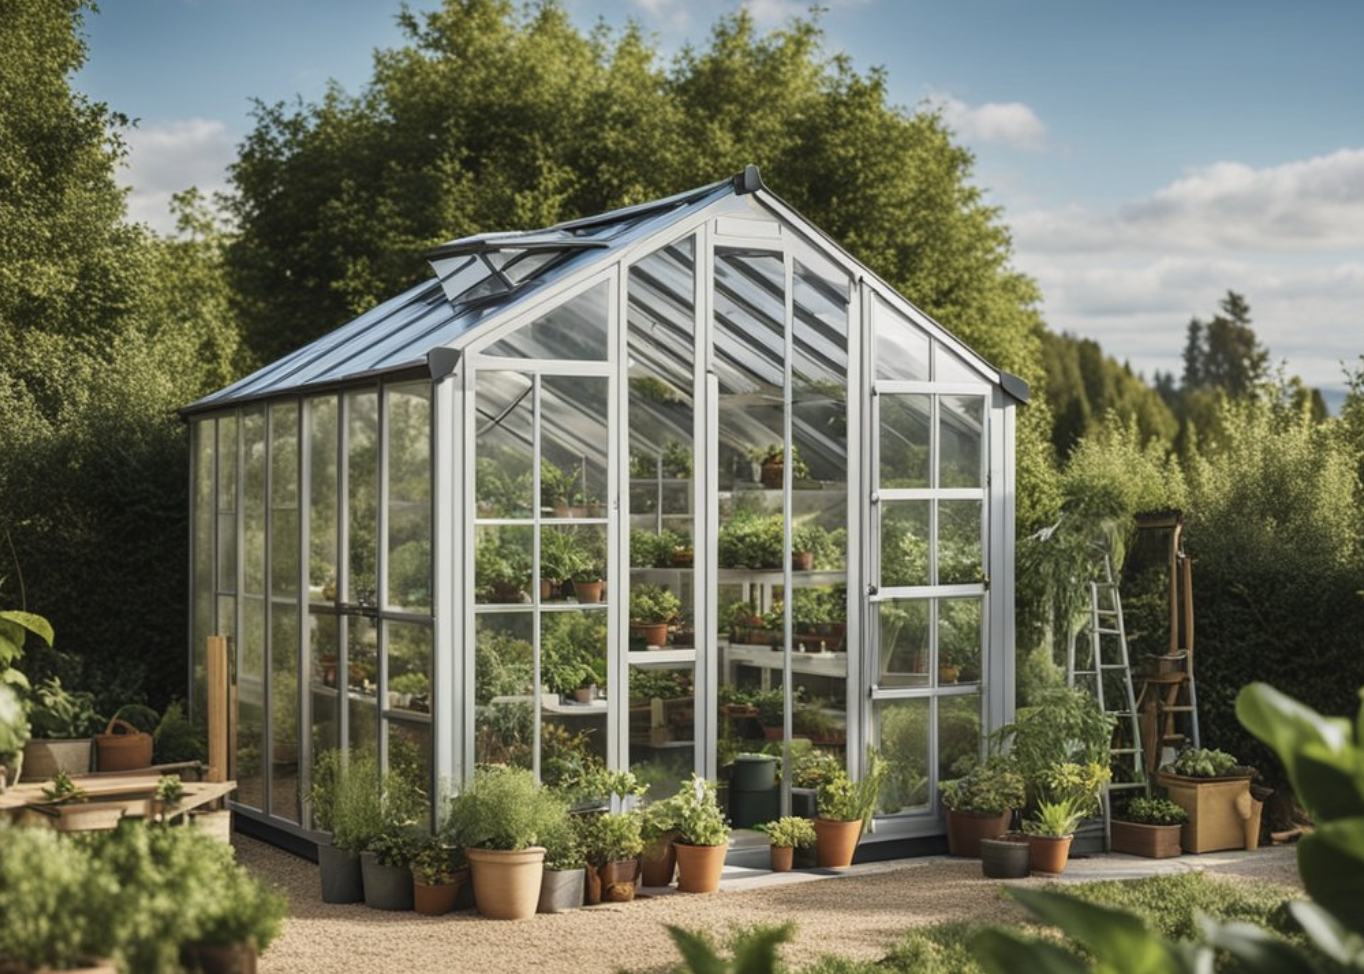
Converting a shed into a greenhouse is a clever way to repurpose an outdoor structure that might otherwise be gathering dust or clutter. I’ve always been fascinated by the idea of giving old things new life, and transforming a shed into a greenhouse is a fantastic way to do just that. It’s about taking that sturdy foundation and clear space, and turning it into a haven for plants to thrive in year-round.
I reckon it’s an approachable project for anyone with a bit of DIY spirit. The key is to ensure your shed can let in plenty of light and maintain a stable temperature for the plants. It’s not just about slapping on some clear panels and calling it a day; it also involves considering ventilation, insulation, and maybe even heating for those chillier months. With the right modifications, an ordinary shed can become a productive and aesthetically pleasing greenhouse.
Doing this swap means you get the best of both worlds: a functional space that feeds your gardening hobby and a sustainable method that makes use of what you already have. My own experience tells me that the joy of watching your greens flourish in a space you’ve created is immensely satisfying. It’s a bit of a journey with some learning and effort involved, but the outcome—a cozy, lush nook brimming with life—is well worth it.
Planning Your Greenhouse Conversion
Before I dive into transforming my shed into a greenhouse, I’ve got to consider a few key factors—like the shed’s condition, where it’s at in my yard, how big I want this greenhouse to be, and what I’ll be building it with.
Assessing the Existing Structure
The first thing I do is take a good hard look at my shed. Is it sturdy enough to support a new role as a greenhouse? I’m checking for any signs of damage, like rot or rust, that could spell trouble down the line. Also, I need to see if there’s enough light coming in, or if I’ll need to add more windows or translucent panels.
Choosing the Right Location
Since plants love sunlight, I’m making sure my shed sits in a spot that gets plenty of it—ideally, north to south orientation to catch the sun’s rays all day. I’m also keeping my eyes open for overhanging trees or buildings that could cast too much shade.
Determining Size and Space Needs
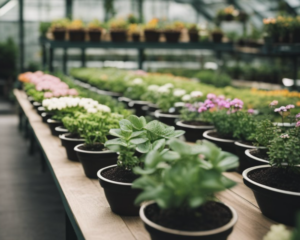
Now, I’m thinking about how I plan to use my greenhouse. I jot down what plants I want to grow and the space they’ll need. Do I need room for shelves, or will I just be using the floor? I’m sketching out a rough layout to visualize how everything might fit.
| Plant Type | Space Required |
|---|---|
| Small Herbs | 1 sq. ft. each |
| Medium Vegetables | 2-3 sq. ft. each |
| Large Flowers | 3-4 sq. ft. each |
Selecting Materials for Conversion
Lastly, I’m picking out materials that lend themselves well to a greenhouse. I prioritize stuff that’s durable and lets in lots of light. Polycarbonate panels are a personal favorite because they’re tough and have great light transmission. Plus, I’m thinking about proper insulation materials to keep my plants cozy year-round.
Preparing the Shed
Before I get my hands dirty, I make sure the shed is clean and stable, the foundation is solid, and the shell is ready to keep in the warmth and out the wet.
Cleaning and Clearing Out
I start by getting rid of any clutter inside the shed. I make a point to:
- Toss any rubbish or unusable items.
- Organize tools and materials I might need later.
- Sweep the floors and wipe down surfaces.
Next, I check for cobwebs in the corners and remove those, ensuring I’m not hosting any uninvited eight-legged guests.
Repair and Maintenance
I inspect the shed thoroughly to identify anything that needs fixing. Here’s my checklist:
- Holes in the walls or roof: Patch them up to prevent leaks.
- Wooden parts for rot: Any rotten pieces get replaced pronto.
- Doors and windows: I check if they close properly, repairing gaps or misalignments.
I aim to create a sturdy space that’ll hold up against weather and time.
Foundation and Flooring
A good foundation means my plants will have a stable home. I make sure:
- The foundation is level and secure—if not, I make adjustments.
- For the flooring, I prefer materials that can handle moisture without rotting. Concrete slabs or treated wood are my go-tos.
This helps to prevent water damage and gives a solid base for everything else.
Insulation and Sealing
Since greenhouses need to stay warm, I:
- Insulate the walls with bubble wrap or foam boards—affordable but effective.
- Seal any gaps around doors and windows with caulk or weather stripping to keep the heat in and the cold out.
This step is crucial for maintaining a consistent temperature, ensuring my plants thrive.
Optimizing for Plant Growth

In my shed-turned-greenhouse, optimizing conditions for my plants is crucial. They need the right amount of sunlight, steady temperatures, proper air flow, and a well-managed water supply to thrive.
Ensuring Ample Sunlight
I make it a point to position my greenhouse to capture the maximum sunlight possible, since plants rely on sunlight for photosynthesis. Through the use of transparent roofing materials like polycarbonate panels, I’ve ensured that plenty of sunlight gets through. Moreover, I strategically place plants so that taller ones don’t overshadow the smaller ones that crave sun exposure.
Temperature and Humidity Control
Getting the temperature and humidity right impacts plant health significantly. I use a digital thermometer to monitor the temperature, aiming to keep it between 65-75°F during the day. For humidity, which should ideally be between 40% and 60% for most plants, I use a hygrometer to keep tabs on the levels. When either the temperature or humidity drifts out of the ideal range, I adjust by using heating mats or misting the plants, accordingly.
Ventilation and Air Circulation
I’ve learned that good air circulation is key to preventing disease and promoting strong plant growth. By installing vents or fans, I ensure a constant exchange of air which provides fresh air and prevents the buildup of stagnant, humid air. This exchange is crucial, and I often find myself checking to make sure that the air is not too still, as this could spell trouble for my green friends.
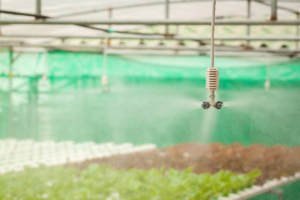
Irrigation and Drainage Systems
Last but not least, I focus on getting the water right, both in how it’s delivered and how it exits the greenhouse. I’ve set up a drip irrigation system for efficient watering, and made sure that there’s a proper drainage system in place to prevent waterlogging. It’s all about maintaining the perfect balance—enough water for my plants to absorb, but not so much that it leads to excess humidity or pooling.
Protecting Against Environmental Factors
To keep my shed-turned-greenhouse thriving, I focus on defending it against critters, illnesses, and the whims of Mother Nature. It’s all about creating a stable environment for my plants.
Managing Pests and Diseases
Pests and diseases can wreak havoc in a greenhouse. I make it a habit to inspect plants regularly for any signs of trouble. Here’s what I usually do:
- Prevention: Keeping everything clean minimizes the risk. I often use sticky traps for flying insects and soap water for the crawlers.
- Identification: When I spot symptoms, I try to identify the pest or disease quickly, using online resources or a local extension service.
- Treatment: I prefer natural remedies like neem oil and introduce beneficial insects like ladybugs as my go-to solution.
Weatherproofing Your Greenhouse
My greenhouse needs to stand up to unpredictable weather, so I’ve taken a few steps:
- Insulation: Bubble wrap is my friend here—it’s affordable and I can fix it to the greenhouse walls to trap heat.
- Shading: On the flip side, too much sun can cook my plants, so shade cloth in the summer is a must.
- Ventilation: To prevent overheating and reduce humidity, I installed vents that I can open or close as needed.
Securing Windows and Openings
Airflow is vital, but so is keeping out drafts and pests. For my windows and openings:
- Sealing Gaps: I check for gaps and apply weather stripping to keep the space snug and draft-free.
- Mesh Screens: Putting up fine mesh screens helps me keep bugs out while letting air in.
- Locks: Strong locks on windows and doors are a must to withstand strong winds and for added security.
Doing It Yourself (DIY) Tips and Tricks
Turning a regular shed into a thriving greenhouse is totally doable on your own. With the right tools, clear instructions, and safety measures, you can start growing your garden paradise in no time.
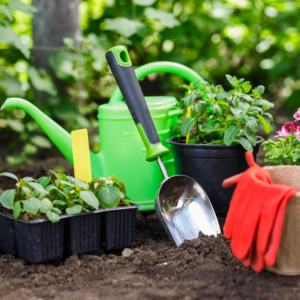
Basic Tools for Greenhouse Conversion
Alright, let’s talk gear. First off, you’ll need a saw for trimming any excess wood or sizing the siding panels. Your trusty drill is essential for securing the frame; believe me, it’s a lifesaver. Keep a measuring tape handy—accuracy is key to a snug fit. A staple gun and utility knife are must-haves for attaching and cutting the covering material. Here’s a quick list of what I use:
- Saw: For cutting to size.
- Drill: For making holes and securing bits together.
- Measuring Tape: Accuracy matters.
- Staple Gun: For fastening the cover.
- Utility Knife: For trimming excess material.
Step-by-Step DIY Process
Step 1: Measure. I size everything up twice to avoid any “oops” moments. Measure the shed and plan where everything goes.
Step 2: Cut and Attach Siding. I use my saw to cut the siding—polycarbonate is great for letting in light. After cutting, I drill the panels into place, making sure they’re tight and secure.
Step 3: Covering the Structure. I lay the greenhouse film over the frame, pulling it tight to avoid any flapping material. Then, I use my trusty staple gun to attach the film all around.
Step 4: Final Touches. I check all the fastenings and trim any excess covering with my utility knife. Now it starts to look like a real greenhouse!
Safety Precautions and Best Practices
Safety is no joke, so I always wear gloves and goggles when I’m sawing or drilling. A bit of DIY can go wrong quickly if you’re not careful. Keep your workspace clean and organized to avoid accidents, and follow the kit instructions—if you’re using one—to a T. Always use the correct tool for the job and take your time. Good practices make for a safe and successful DIY project. Here’s a reminder:
- Gloves and Goggles: Non-negotiable for protection.
- Clean Workspace: Prevents accidents.
- Correct Tools: No improvising with tools.
- Steady Pace: Rushing invites mistakes. Take your time.
Accessories and Extras

I’ve found that decking out my shed-turned-greenhouse with the right gear makes all the difference. It’s about marrying form and function to create a space that’s both appealing and efficient.
Adding Decorative and Functional Elements
I love making my space look good while keeping it productive. Benches are a must-have – they not only provide a place to work but also maximize space for plant storage. For a functional greenhouse, it’s essential to choose materials that withstand humidity and heat. I found that cedar wood is a great option; it’s durable and has a natural resistance to moisture.
I didn’t forget about the aesthetic either. Adding a few decorative touches, like ornamental planters or a unique watering can, gives the place character. Plus, a well-designed layout with clear access paths makes the greenhouse not just pretty but practical, too.
Automation and Monitoring Tools
I’m all about making my life easier with a bit of tech. Automation systems are game-changers, especially for climate control. I installed a simple system that adjusts the greenhouse plastic vents and shades automatically based on temperature.
As for monitoring, I can’t talk it up enough. I have sensors to track temperature, humidity, and light levels. It’s super handy – I get updates right on my phone, which is perfect since I’m not always around to check in person. Adding LED grow lights was another smart move. They ensure my plants get enough light, especially during those short winter days, and they’re energy efficient.
Expanding with Add-ons and Kits
When I felt the need for more room, I looked for expandable options. There are awesome add-on kits out there that let you extend your greenhouse as your collection grows. I installed a few extra bays with ease. Each bay has its own functional aspect, like a dedicated propagation area or a space for taller plants.
Getting the expansion right required enough access for both me and my plants, and ensuring the continuity of greenhouse plastic sealing to maintain the climate inside. It’s been a neat project, and seeing my plants thrive makes it all worth it.
Benefits of Greenhouse Kits
When I’m looking to extend the growing season for my plants, a greenhouse kit is a super handy solution. They’re pretty easy to set up and come with all the bits and bobs I need, which saves me a ton of time. Plus, I get to start gardening earlier in the spring and keep at it well into the fall. Sometimes, if I’m really lucky with my set-up, I can grow veggies all year round!
One thing I love is how adaptable they are. I can find a kit that fits my backyard size perfectly. And in a pinch, if I need to shift things around, many kits are light enough to move without calling in my friends for a heavy-lifting party.
Durability is another big perk. These kits are typically made of materials like polycarbonate panels that withstand unpredictable weather, protecting my green buddies from hail or an unexpected frost.
Here’s a rundown on why I think these kits are great:
- Ease of Assembly: Usually just need a regular toolbox.
- Extend Growing Seasons: Grow plants even when it’s chilly outside.
- Adaptability: They come in various sizes to suit my space.
- Durability: Tough materials protect my plants.
- Cost-Effective: Less expensive than building a greenhouse from scratch.
- Controlled Environment: Helps keep pests and diseases at bay, and I can manage temperature and humidity levels just right for my leafy friends.
Investing in a greenhouse kit means I get to up my gardening game without breaking a sweat over building something from the ground up. It’s like getting a head start on my favorite hobby.
Conclusion
Transforming my shed into a greenhouse was a rewarding DIY project. It wasn’t just about giving new life to an unused space; it was about creating a thriving environment for plants to grow year-round. Here’s what I took away from the experience:
- Planning is key. I outlined my goals, budget, and design before picking up any tools.
- Ventilation and insulation matter. These elements keep temperature and humidity at optimal levels.
- Materials make a difference. I chose polycarbonate panels for durability and light transmission.
Remember, regular maintenance keeps the greenhouse in top condition. I check for any wear and replace damaged panels to maintain a healthy growing space.
While I faced challenges, like ensuring proper sealing, the skills I learned were invaluable. I now enjoy a lush, green oasis that was once a simple storage spot.
Looking back, I feel pleased with my sustainable choice. Not only did I repurpose a structure, but I also nurtured my love for gardening. My plants are thriving, and so is my passion for green living.